Free SAP Business Objects 4.1 Course

Are you looking to learn more about Business Objects 4.1?

Check out Open SAP – https://open.sap.com/ and signup for ‘BI 4 Platform Innovation and Implementation’.


his course is aimed at experienced BI system administrators responsible for the implementation, deployment, and administration of SAP BusinessObjects BI 4 but is also open to anyone interested in this topic.

To get the best out of this course, you should have a fundamental understanding of SAP BusinessObjects BI 4 Platform and a desire to learn more.

Start: November 11, 2013, 9:00 am (CET)
Duration: 4 weeks (4 – 6 hours per week)
Final exam: December 6 – 17, 2013
Course language: English


This is great considering the course is FREE!

The power of Business Objects 4.0 OpenDocument


With OpenDocument a web intelligence report can pass the reports results to another report. This functionality is powerful if the user would like to drill down on particular field.

First I would recommend reading the documentation on OpenDocument link to get you familiar with OpenDocument and the correct syntax.

The steps to utilize OpenDocument in a Web Intelligence reports if the following:

  1. Create a variable that makes reference to your constructed parameterized URL – this is a URL the points to your underlying report.

    http://<servername>:<port>/BOE/OpenDocument/opendoc/OpenDocument.jsp?<parameter1>&<parameter2> …..


  2. Next in the underlying report has make reference to the drill down field in a filter within the report.

I recently created a report that returns a bunch of business partners then if the user wants to find out more information then he/she can click on the business partner and then the user will be sent to a new report with all the details on the business partner. This functionality was done using OpenDocument.

The SAP Business Objects 4.0 Install

Hello there!

In this post I’m going to go through the Business Objects 4.0 Installation process using a Windows Server.

Pre steps before the installation

  • Purchase a Windows 2008 R2 64bit server with at least 32 gigabytes of ram
  • Install NET Framework 3.5 SP1 or greater
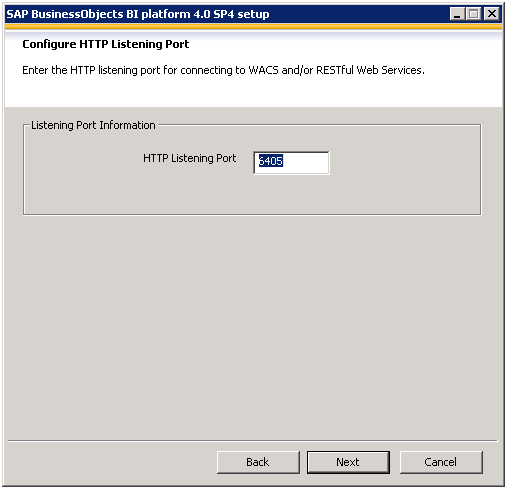
  • Open ports 8080, 6400 – 6410 ( you only normally use the ports 8080, 6400, 6401, 6402, 6403 and 6410). These ports should be open for bi directional communication
  • Download the Business Objects 4.0 server install from the SAP Service Market

Beginning the install, make sure you run the install on your local drive

  1. Double click on the setup file, the install will begin

  2. Select ‘English’ for the install

  3. Installation process will check server pre-request items. They need to be in “Succeeded” status before installation. Click next if all the items Succeeded


  4. Make sure any other program running are closed just so the install won’t encounter any issues then click Next
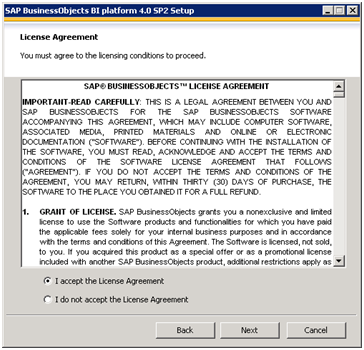
 

  1. Read and accept the License Agreement then click next
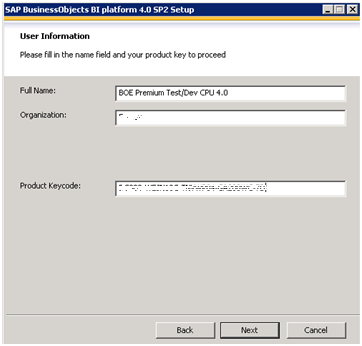
 

  1. Type the User Information. Use the License Key obtained from SAP.
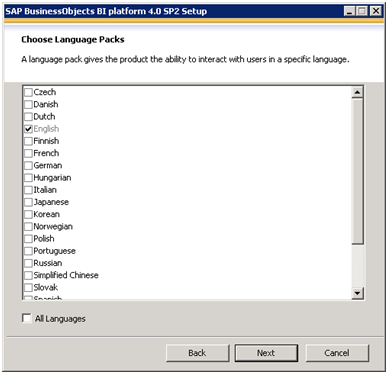


  2. Pick the English Language


  3. Choose the Full Install type for installing the complete SAP BusinessObjects BI platform


  4. Specify the destination folder


  5. Specify CMS and Auditing database to use an existing one and select the database type as shown in next few screenshots.


  1. Use Tomcat web server comes with BO package


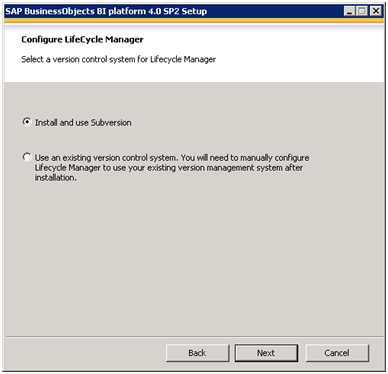
  1. Configure LifeCycle Manager to Install and use Subversion.
 

  1. Configure Node Name (use the server name) for SIA

  1. Enter the port number for CMS configuration.


  2. Specify the new password for the CMS administrator account and a value for the CMS cluster key.

  1. Configure CMS Repository Database – Oracle

Specify the database to be Oracle, then put in the database connection info.


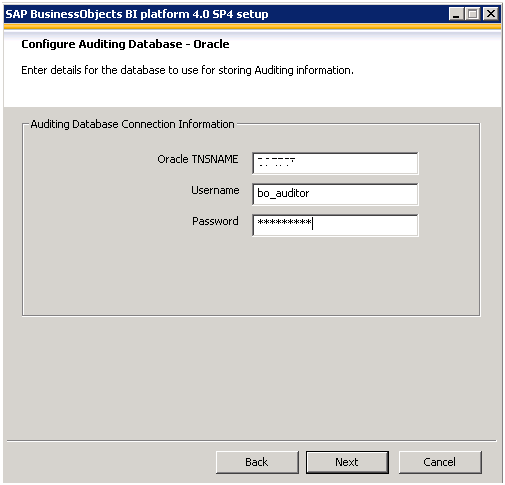
  1. Configure Auditing Repository Database – Oracle

Specify the database type to Oracle, then the connecting info.
 

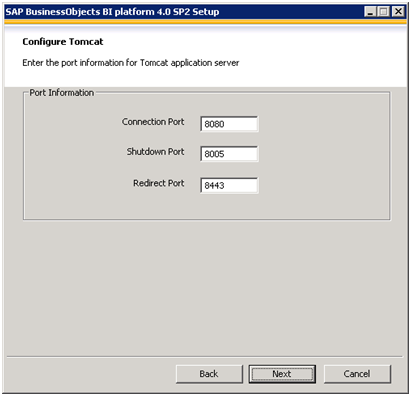
  1. Tomcat setting, all take default


  2. Subversion config (need to put in LCM password)


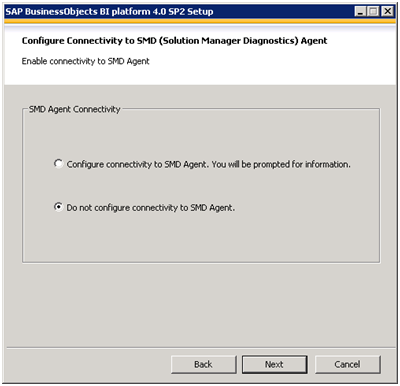
  3. Select the option as shown below as it is not necessary for enabling connectivity to SMD agent.
     

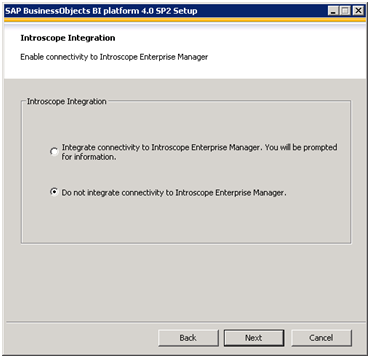
  4. Select the option as shown below as it is not necessary for enabling connectivity to Interoscope Enterprise Manager.
     

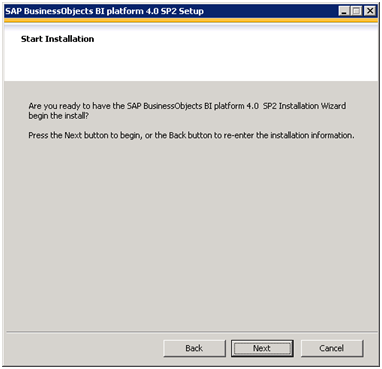
  5. Select Next to start the Installation

It will take a while when you click on “Next”…

Post install, nothing need to be done except to press “Next” and Finish. This concludes the install.

If you have any questions about installing please feel free to leave a comment.


Patching Business Objects 4.0

Hello,

I just recently patched my Business Objects System from SP5 Patch 3 to SP5 patch 6 , and I noticed the SSO with Active Directory was broken. After patching the global.properties file was back to its default state and all the session parameters were set back to 20 minutes.

In order to avoid losing your Business Objects Configuration complete the following:

  1. Do a full backup of your system prior to patching
  2. Next take a copy of the following files

If you have Single Sign On with Active Directory backup the following files

  • bscLogin.conf and krb5.ini files, these files are stored at the location c:/windows folder


Other files that need to be backed up

  • BILaunchpad.properties , this file is stored <Install Directory>\SAP Business Objects\Tomcat6\webapps\BOE\WEB-INF\config\custom
  • global.properties, this file is stored <Install Directory>\\SAP Business Objects\Tomcat6\webapps\BOE\WEB-INF\config\custom
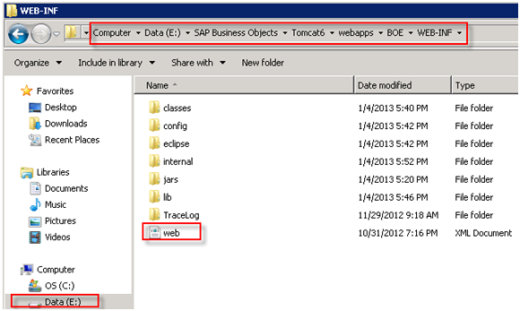
  • web.xml, this file is stored Install Directory>\\SAP Business Objects\Tomcat6\webapps\BOE\WEB-INF


Once the patch is complete you can just copy over the global.properties files to <Install Directory>\SAP Business Objects\Tomcat6\webapps\BOE\WEB-INF\config\custom and for the session variable I just went through my documentation located here:


https://vynesolutions.wordpress.com/2013/04/19/configuring-business-objects-4-0-session-timeout-settings/


Also if there’s anything else that isn’t working you’ll have the files to compare against the original state.


This process will eliminate the risk of patching your Business Objects server. If you have any other suggestions I would definitely like to hear your comments.


Configuring Business Objects 4.0 Session Timeout Settings

The BI Launchpad comes out of the box with a default the timeout sessions configured to 20 minutes.

If you would like this changed then there are a few areas that need to be changed.

  1. Change session setting in Web.xml File
  • Go to <Install Directory>\SAP Business Objects\Tomcat6\webapps\BOE\WEB-INF
  • Open web.xml file in notepad Search for the following tag in web.xml:


  • Search for the following tag in web.xml:
  • Change the session timeout to required time such as 120 minutes.


  1. Change settings for CMC
  • Log onto to Central Management Console (CMC)
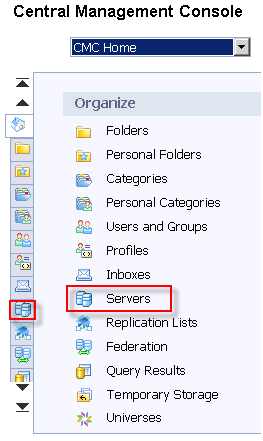
  • And go to Servers


  • Under Server List go to Web Intelligence Server
  • Right Mouse Click on Web Intelligence Server and click Properties
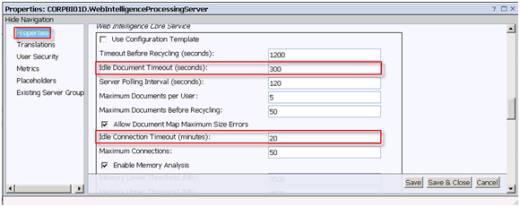
  • Change Idle Document Timeout (it is in seconds) 300
  • Change Idle Connection Timeout (it is in minutes) 540


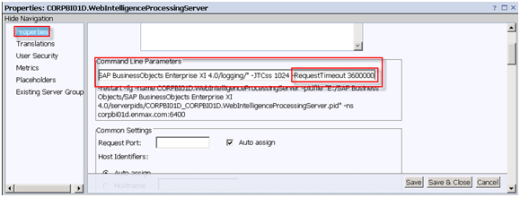
  • Change the timeout at the end of command line.


  1. Restart the services
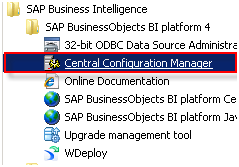
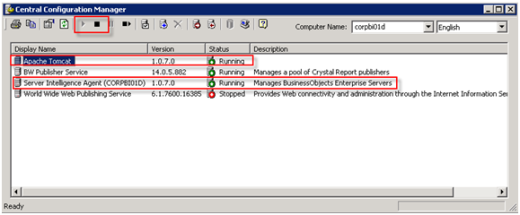
  • Go to CCM – Start > All Programs > SAP Business Intelligence > SAP BusinessObjects BI Platform 4 > Central Configuration Manager


  • Stop Apache Tomcat and start back
  • Stop SIA and start it back


  1. Make changes to Registry (These setting should be changed by Windows Admin)
  • Open the Registry Editor by going to Start > Run > regedit
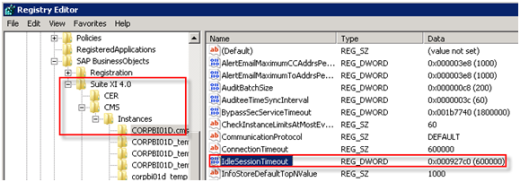
  • Locate the: HKEY_LOCAL_MACHINE\SOFTWARE\ SAP BusinessObjects\Suite XI 4.0\CMS\Instances\ <NodeName>.cms node
  • Set the. IdleSessionTimeout to 14400000


  • Locate the  HKEY_LOCAL_MACHINE\SOFTWARE\ SAP BusinessObjects\Suite XI 4.0\default\WebIntelligence\Server\Admin\SwapTimeOut node
  • Set the SwapTimeOut to 3600000


Configuring Business Objects 4.0 SSO with SAP BW

This guide will provide all the details required to setup SSO between Business Objects and SAP BW.

Here are the steps that need to be accomplished

  1. Generate keystore and certificate for SAP BO BI4.0
  2. Import SAP BO BI4.0 certificate into SAP BW
  3. Setup of SAP SSO Service in SAP BO BI4.0 CMC
  4. Setup of SSO against SAP BW for SAP BO BI4.0 BICS or JCO connections


  1. Generate keystore and certificate for SAP BO BI4.0
  • Log into the server
  • Bring up the command prompt and browse to the following location <INSTALLDIR>\SAP BusinessObjects Enterprise XI4.0\java\lib


  • Run “<INSTALLDIR>\SAP Business Objects\SAP BusinessObjects Enterprise XI 4.0\win64_x64\sapjvm\bin\java” -jar PKCS12Tool.jar -alias mybo -storepass admin123 -dname CN=BOTEST -validity 2555


This will generate the cert and keystore file


  1. Import SAP BO 4.0 Certificate into SAP BW
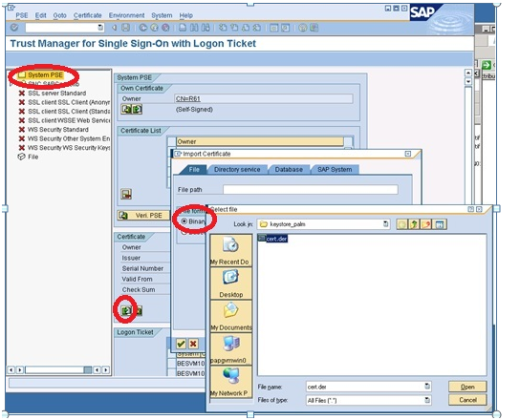
    1. Send the Binary import cert.der over to the Basis/Netweaver team
    2. Using the t-code STRUSTSS02 the Basis/Netweaver will import the certificate


    3. Make sure that cert.der is imported Binary into System PSE


    4. Add the Certificate to the certificate list, click button ‘Add to Certificate List’


    5. Add the certificate to ACL

      Click button ‘Add to Certificate to Access Control List

      Enter System ID – This System ID will be used in BI4.0 CMC to setup of SAP SSO Service


  1. Setup of SAP SSO Service in SAP BO BI4.0 CMC
  • Log into the CMC
  • Go to Authentication and click on SAP


  • Fill out your system information and click the Update button
  • Import Roles, Add All roles and bring them over to the right hand side


  • Verify SAP Authentication is enabled

  • Import keystore keystore.p12 file

    All this information should have been gathered when generating the certificate


  1. Setup of SSO against SAP BW for SAP BO BI 4.0 BICS or JCO connections
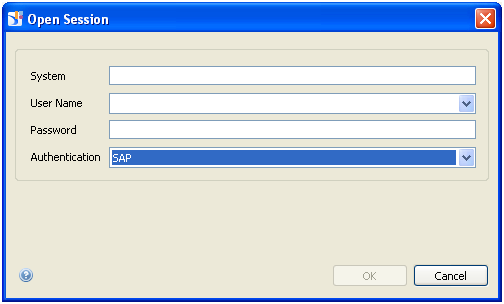
    1. Open the Information Design Tool (IDT)


    2. Create an SAP Connection


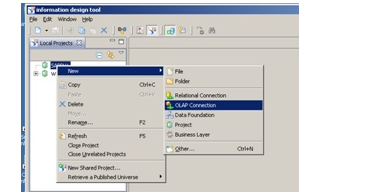
    3. Create an OLAP Connection

      \


    4. Select SAP BICS Client


    5. Select SAP BICS Client


    6. Select the cube you would like to use for the query


    1. Open Web Intelligence and create a new report by select a Bex query as a data source


      You will now be able to use your data source that will utilize single sign on


These are the steps to configure Business Objects 4.0 single sign on with SAP BW. There are quite a few steps so if you have any questions please don’t hesitate to contact me @ info@vynesolutions.com


How can I set a date filter to today’s date in Web Intelligence?

I want to create date filter that dynamically filters on today’s date.

  1. Open Information Design Tool
  2. Go to your Project and open the Data Foundation Layer by double clicking on the layer in your project.
  3. Right click in the Master area Insert Derived Table ….


  1. Enter the name ‘Today’ and enter the following sql

Select curDate()

From @catalog(‘ZCDUNDAY_CONNECTION’).”PUBLIC”.”IZCDUNDAY”


For the catalog(‘ZCDUNDAY_CONNECTION’).”PUBLIC”.”IZCDUNDAY” just select a dummy table from your tables

  1. Next save your Data Foundation
  2. Recreate you’re the Business layer


    You can now see Today is part of your Business Layer aka universe


  3. Right click and publish the universe to your repository


  4. Open up your Web Intelligence Tool and open the universe


  5. Now create a filter pick Equal to and now select the value
    Object from this query


    And pick the new object Today that we recently created at the universe level


  6. Now we can run the report and it will dynamically run on today’s date.

If you have any questions on this please feel free to contact me at info@vynesolutions.com.

Watch out for the Platform Search in the Central Management Console!!!

The platform search comes configured out of the box to endlessly issue ‘SELECT DISTINCT…” commands against the database for objects in varying universe. This almost brought down our production Oracle server which can be detrimental to a busy company.


In order to configure the platform search to search only on scheduled intervals and not to query every item in universes I will show how we configured our system

  1. Log into the Central Management Console
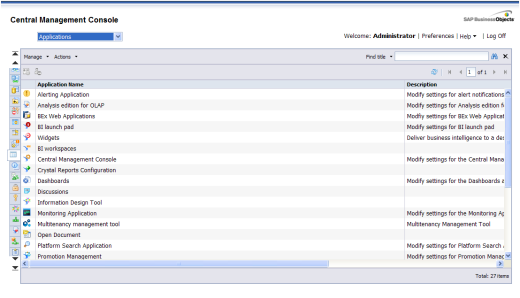
  2. Go to ‘Application


  1. Right click on ‘Platform Search Application’ and go to properties

  2. Set “Crawling Frequency” to Scheduled crawling

  3. Set the “Level of indexing” to Platform Metadata and in “Content Types” uncheck Universe

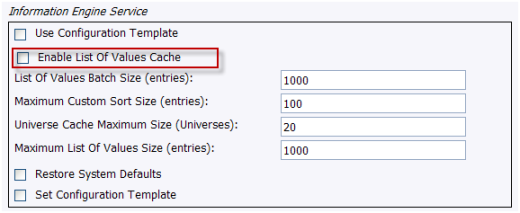
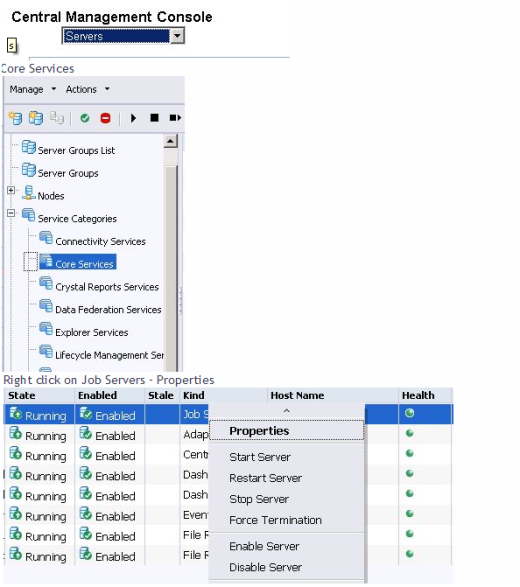
  4. Lastly go to your “Web Intelligence Processing Server” and right click on properties and disable Enable List of Values Cache

This should fix any issues you might have with the Platform Search. If you have any questions feel free to contact me @ info@vynesolutions.com


Defaulting the BI Launchpad Splash Page to folder view

How to default a users BI Launchpad (aka splash page) settings to folder view.

  1. Log into the CMC
  2. Go to ‘Users and Groups’
  3. Go to Group List on the left hand side


  1. Right click on the group the user is a member of and click on ‘BI launch pad Preferences’


  1. Next Set BI launch pad start page to ‘Folders


  1. When the user now logs in the folder hierarchy will be displayed